
Email and SSO settings
You can configure your organization’s own mail server (SMTP) and an external OIDC provider (SSO). Both are optional; the standard features work without them.
1Email settings (SMTP)
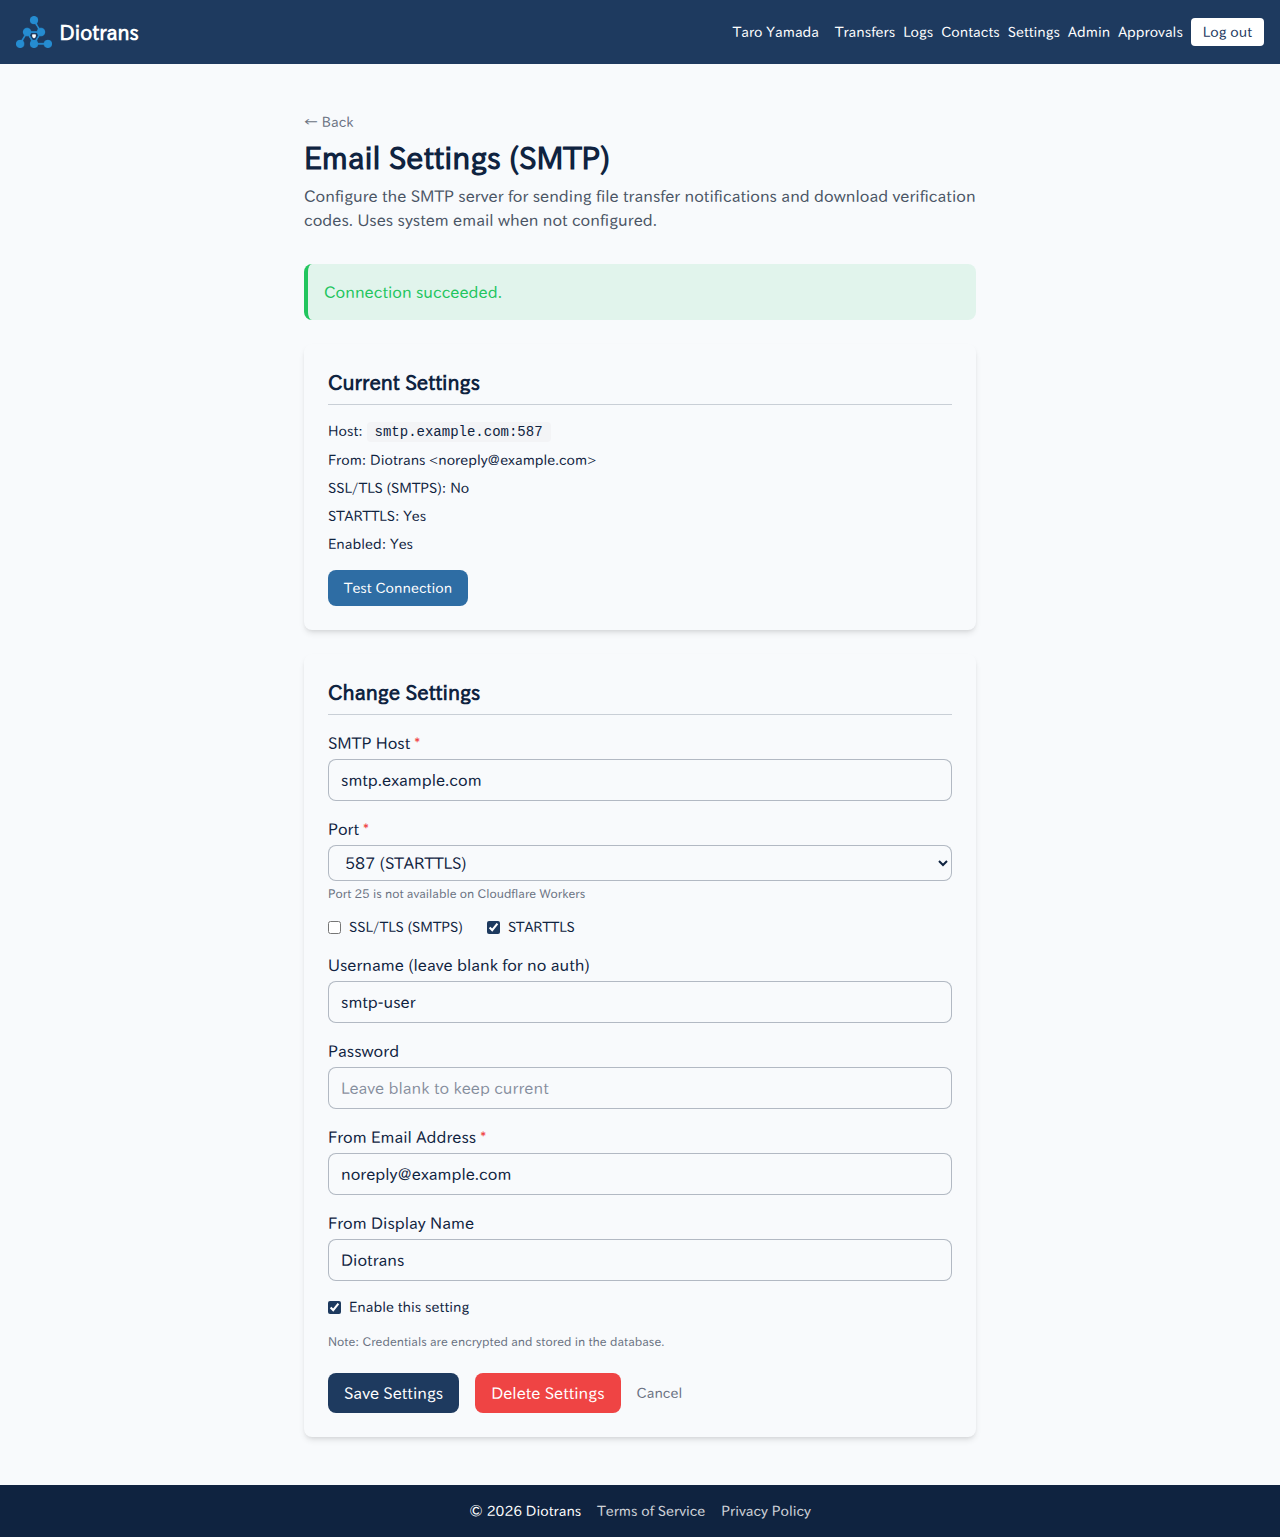
Configure the SMTP server used for file transfer notifications and download verification codes. If it is not configured, the system mail sender is used.
| Item | Description |
|---|---|
| SMTP host / port | The mail server host name and port. Port 25 cannot be used from Cloudflare Workers. Use 587 (STARTTLS) or similar. |
| SSL/TLS (SMTPS) / STARTTLS | Choose the connection method that matches your port. |
| Username / password | Leave blank if no authentication is required. Credentials are stored encrypted. |
| From email address / display name | The sender of notification emails. Using your organization’s domain is recommended. |
“Test connection” sends a test email so you can verify. Save after a successful test. “Delete settings” returns to the system mail sender.
2Authentication settings (OIDC / SSO)
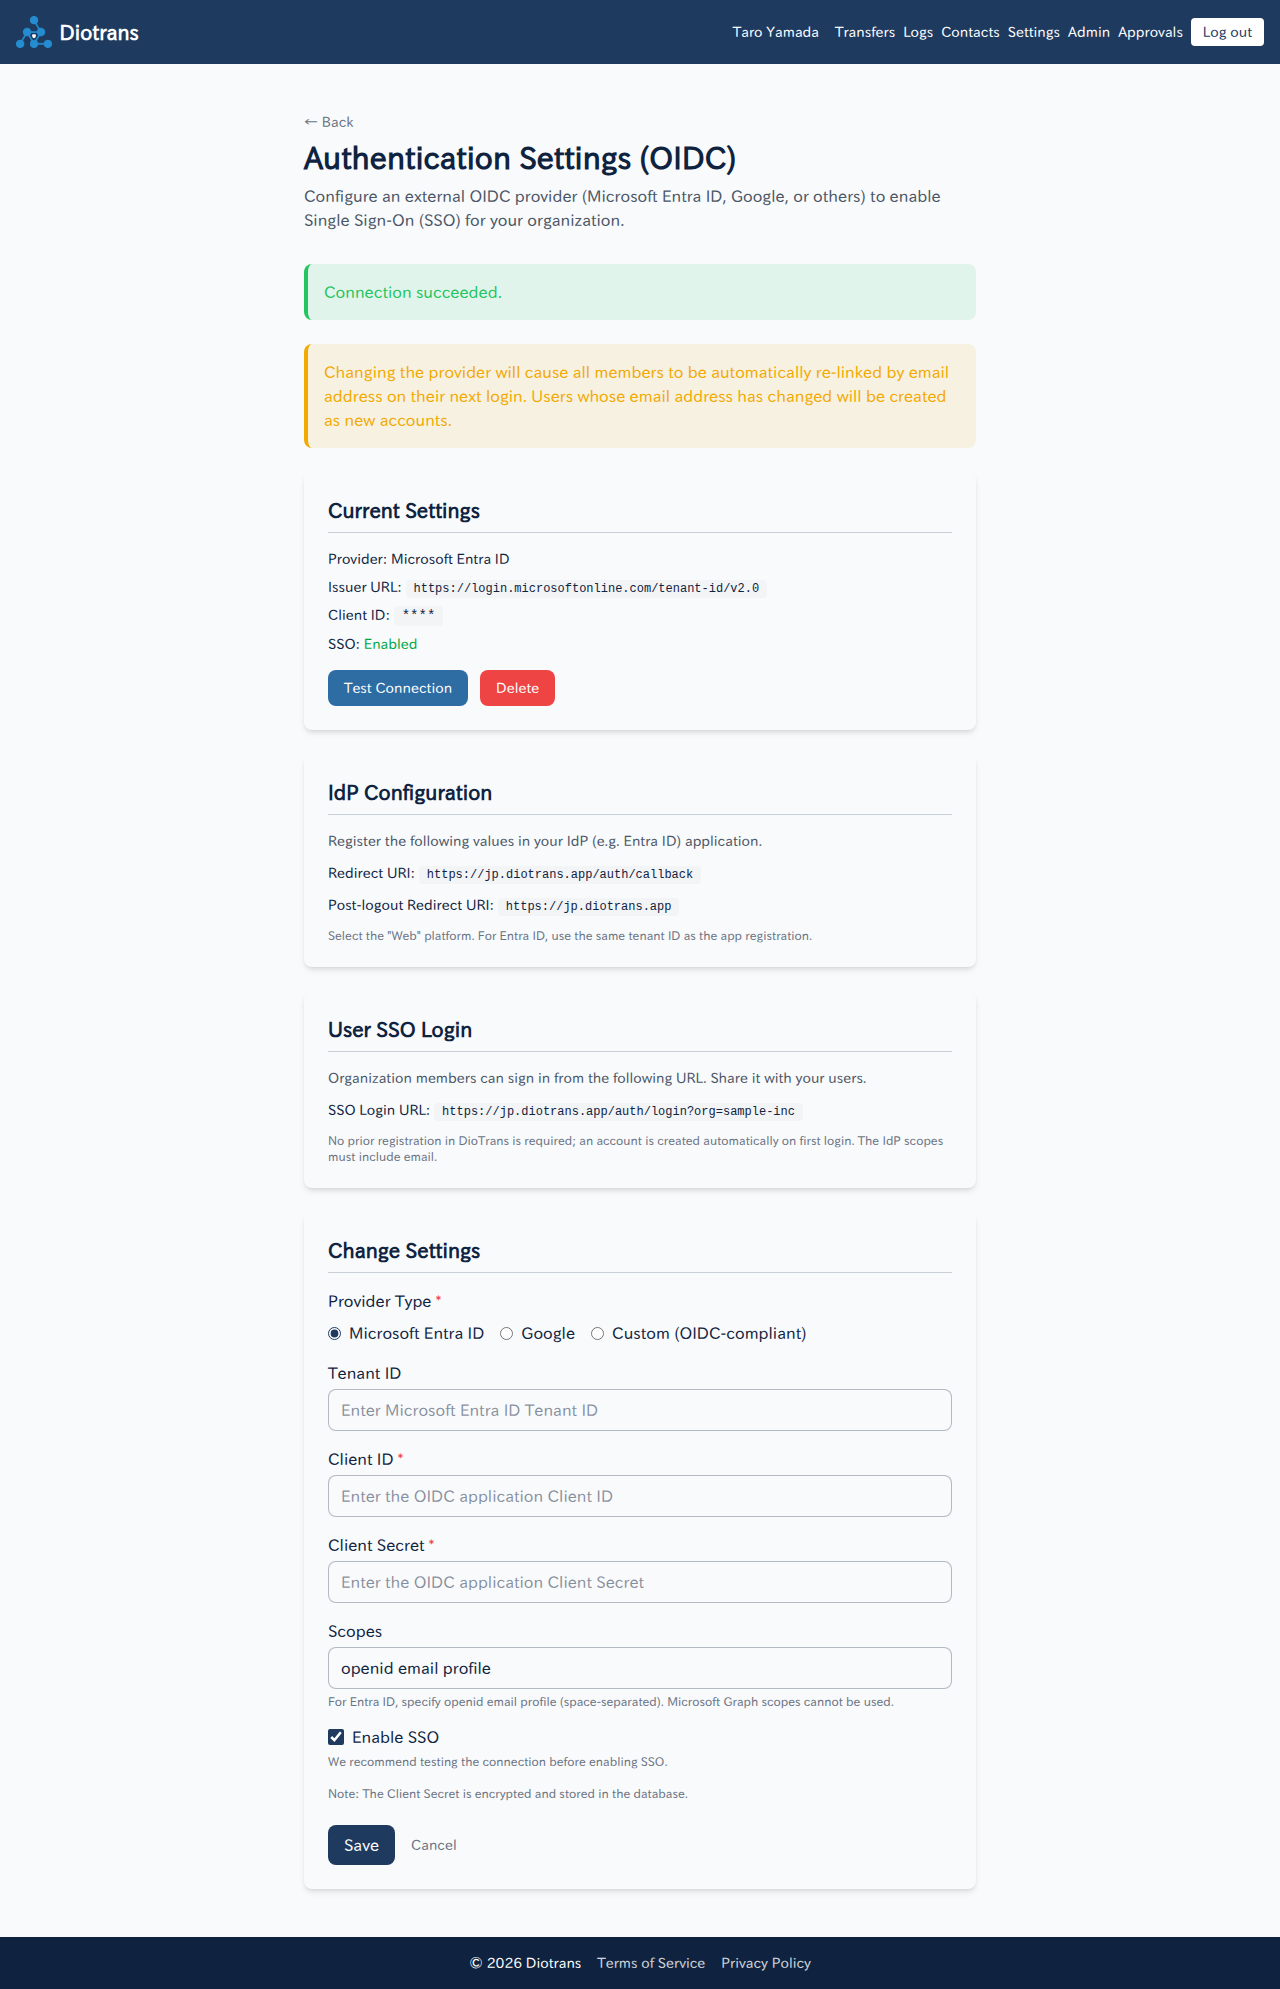
Configure an external OIDC provider (Microsoft Entra ID, Google, or custom) to enable organization single sign-on (SSO).
Register the app with the IdP
In your provider’s app registration, set the “Redirect URL” and “Post-logout redirect URL” shown on the screen. Choose “Web” as the platform.
Enter the provider details
Enter the provider type (Microsoft Entra ID / Google / custom), tenant ID or issuer URL, client ID, client secret, and scopes (for example,
openid email profile).Test the connection
Use “Test connection”. Always test before enabling. The client secret is stored encrypted.
Enable SSO and share the URL
Choose “Enable SSO” and save. Share the “SSO log-in URL” (
/auth/login?org=organization-slug) with your members.
Changing the provider re-links all members by email address at their next log-in. Users whose email address changed are created as new accounts. Tell users before making the change.
See Signing up and logging in for the SSO log-in steps.