
Sending files
This page covers creating a transfer, approval in organizations that require it, and managing transfers after sending. Files are encrypted in your browser before being sent to storage.
1Before you send
- During the trial, files are limited to 3 MB each.
- In organizations that require approval, recipients are not notified when you send. They are notified after an administrator approves the transfer.
- If you use passphrase protection, make sure you can share the passphrase with recipients through another channel, such as phone or in person.
2Creating a transfer
Choose “+ New Transfer” from the transfer list
Open the creation screen from “Transfers” in the header or “+ New Transfer” on the transfer list.
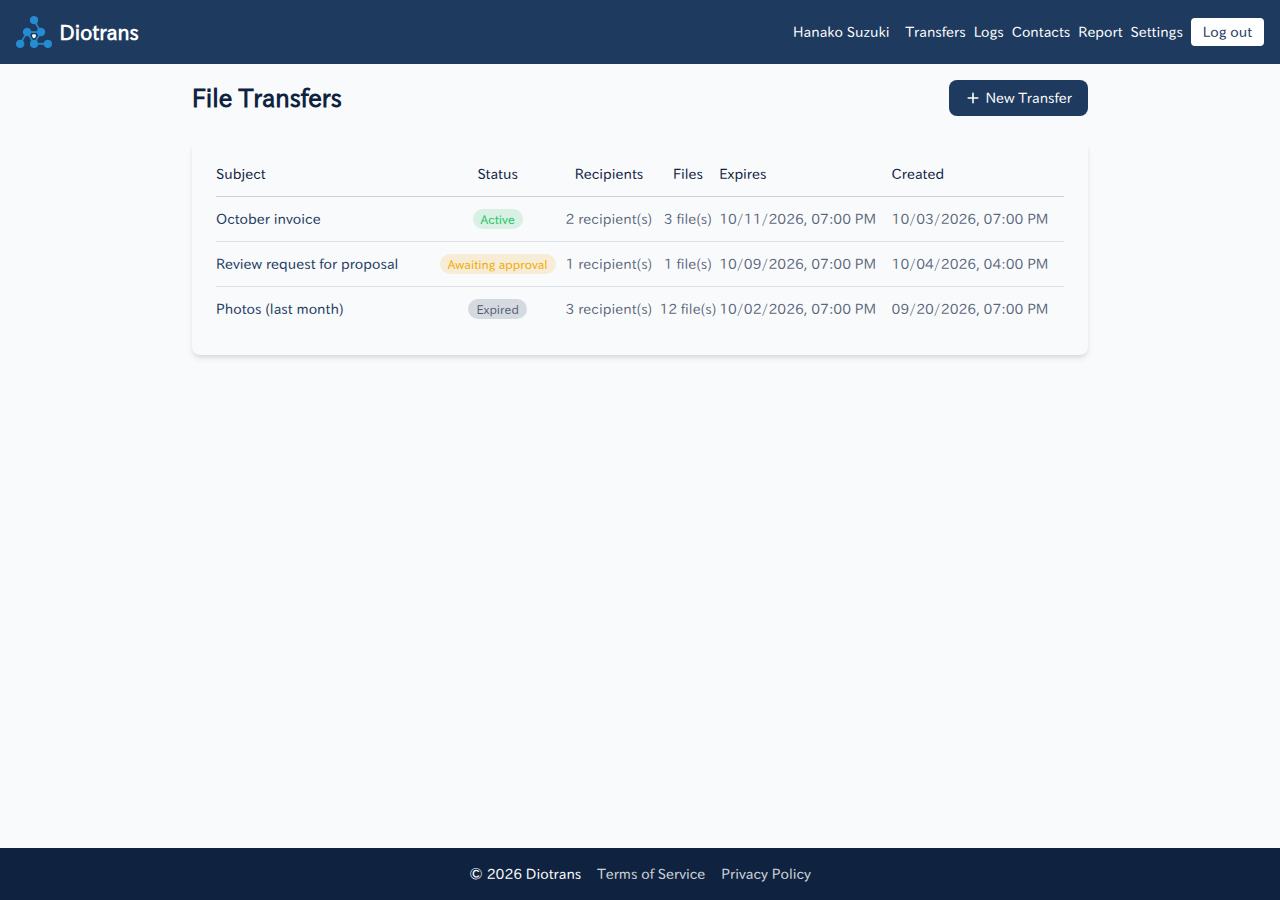
The transfer list. The status shows whether a transfer is active, waiting for approval, or expired. Enter recipients
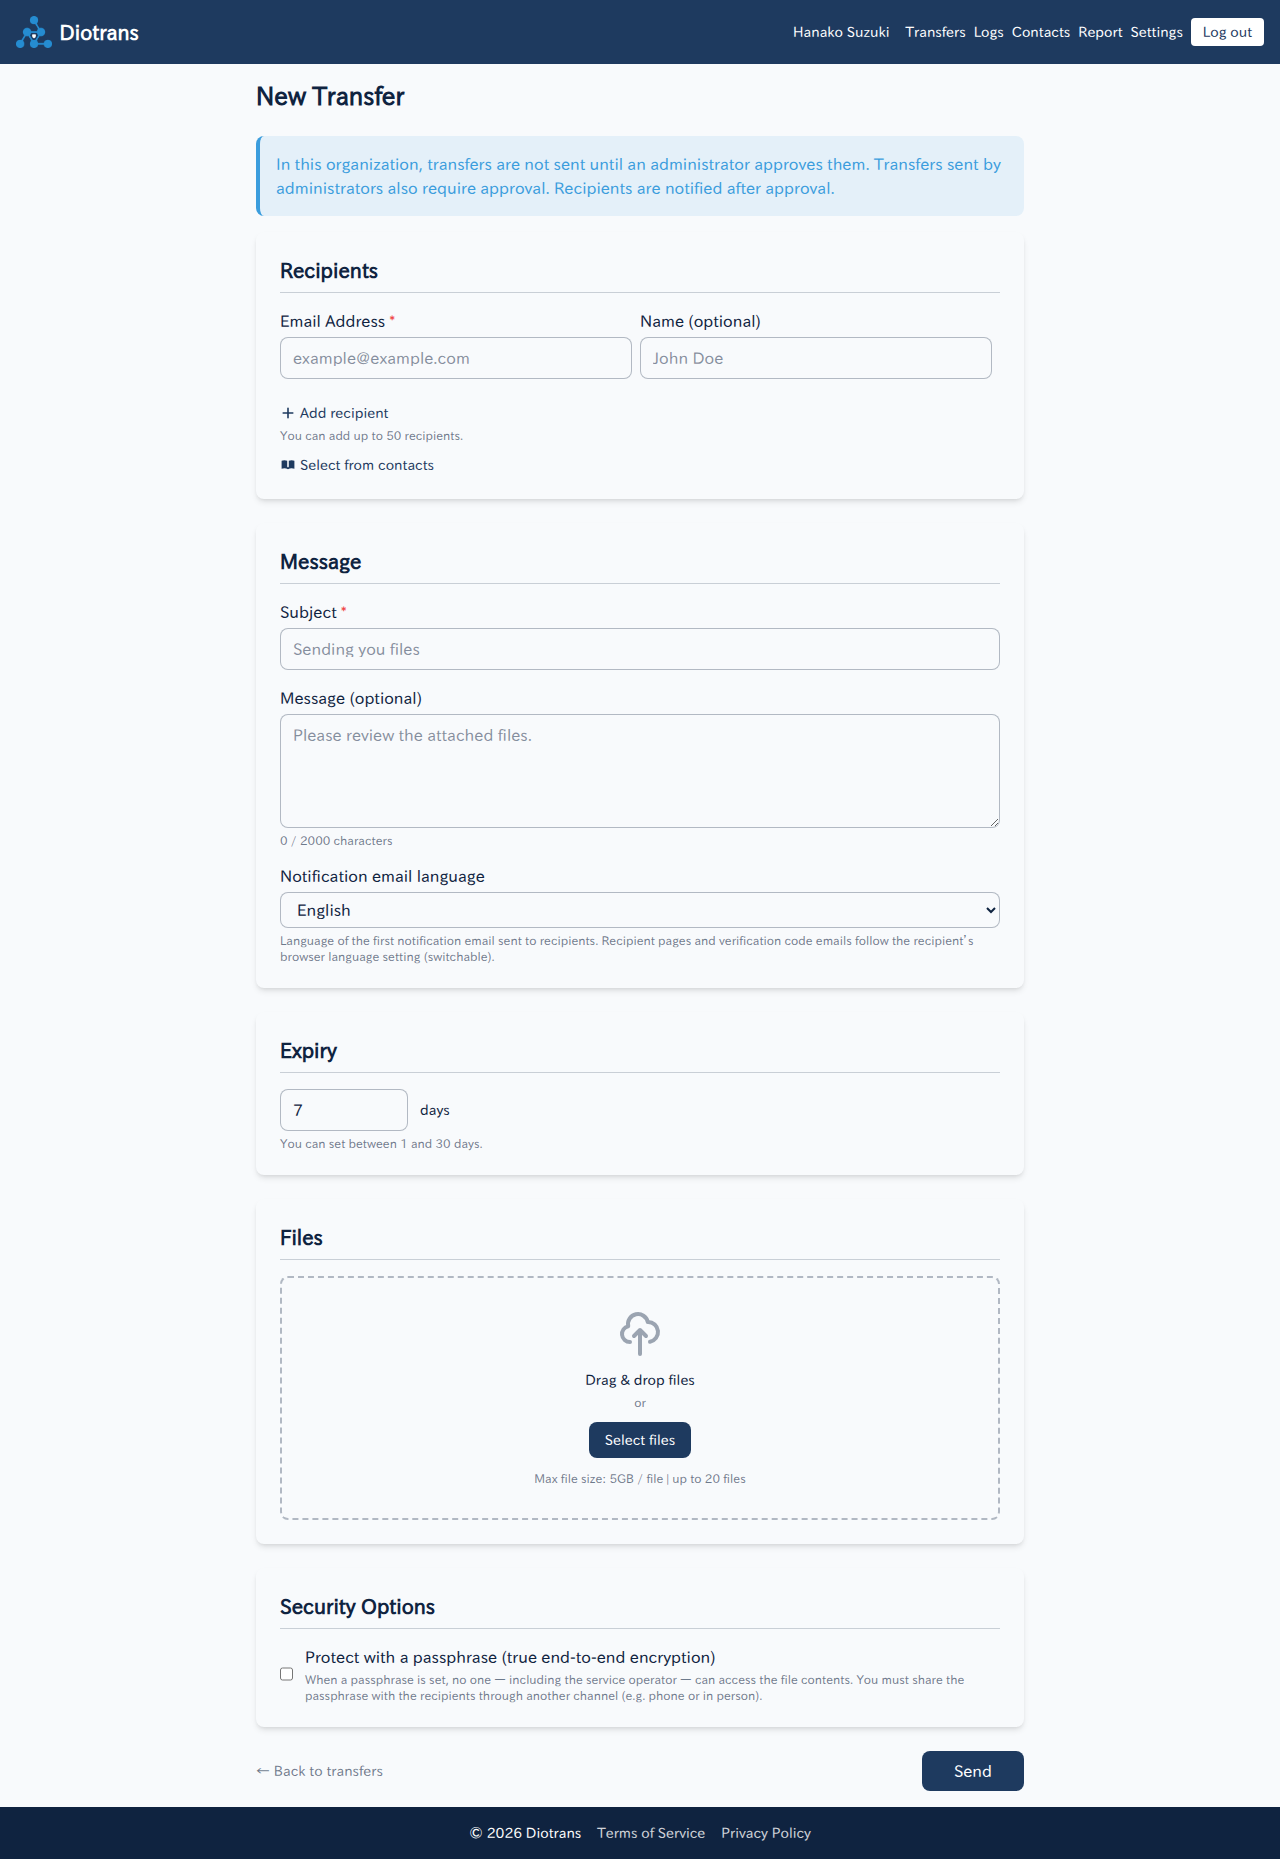
Enter the recipients’ email addresses (up to 50 per transfer). Names are optional. Use “+ Add recipient” for more rows, or “Select from contacts” to choose saved addresses.
Enter a subject and message
The subject is required. The message is optional, up to 2,000 characters. Choose the notification email language here as well.
Set the expiry
Choose how long the files can be downloaded, from 1 to 30 days. The default is 7 days. Files are deleted automatically from storage after expiry.
Add files
Drag and drop files, or choose “Select files”. Up to 20 files per transfer, each up to 5 GB on paid plans (3 MB during the trial).
Set passphrase protection (optional)
Tick “Protect with a passphrase” for stronger encryption. Recipients must then enter the passphrase, which you share through another channel. If the passphrase is lost, nobody can restore the files.
Choose “Send”
Files are encrypted in your browser and uploaded directly to storage. Keep the window open until the progress completes.
3Approval in your organization
If “Require administrator approval before sending” is enabled in the organization settings, a transfer you send is marked “Pending approval” and recipients are not notified yet. Transfers sent by administrators also require approval.
An administrator checks pending transfers
Administrators open the pending list from “Approvals”. The subject, sender, files, recipients, and creation date are shown.
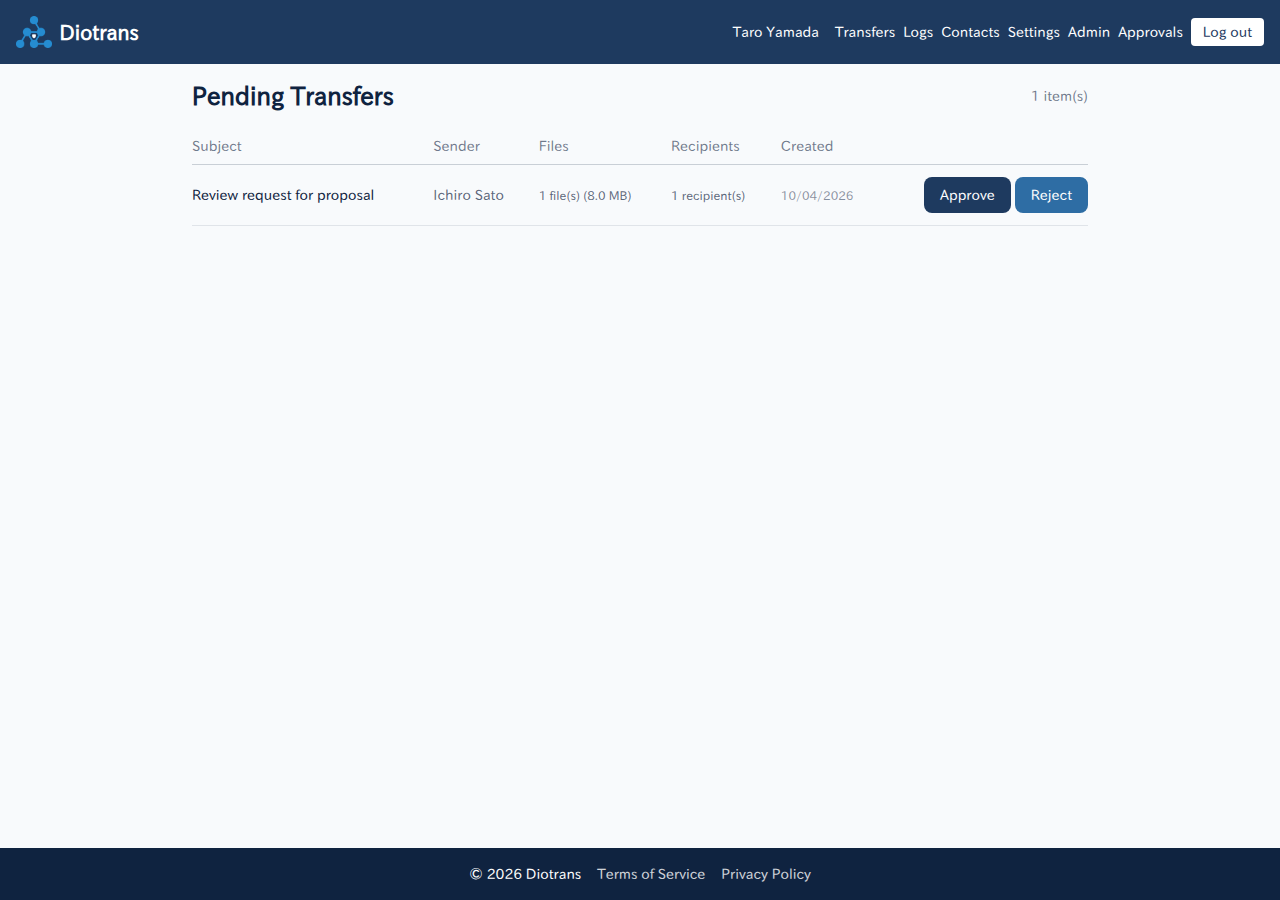
The pending transfers list (administrators). Choose “Approve” or “Reject”
Approving sends the notification email to recipients. Rejecting means the transfer is not sent. See Pending transfers for details.
4Managing sent transfers
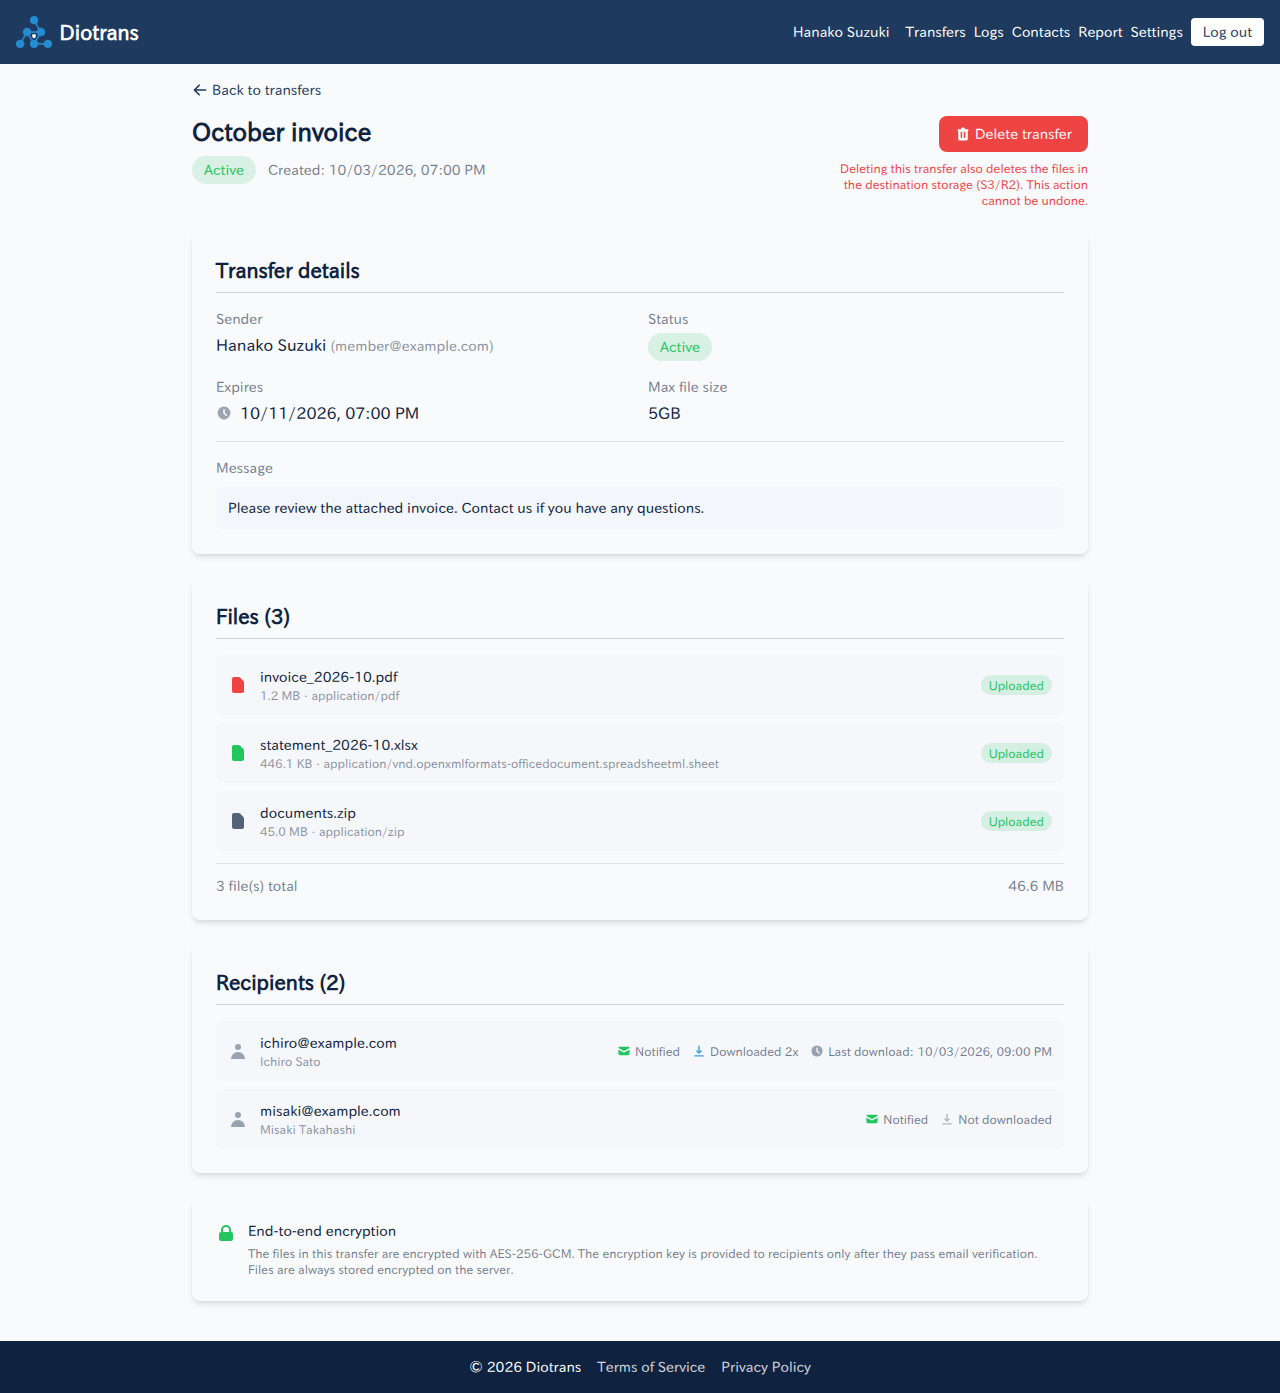
Open a sent transfer from its subject in the list. The status shows values such as “Active”, “Pending approval”, and “Expired”.
| Action | Description |
|---|---|
| Check download status | For each recipient, check whether they were notified, the number of downloads, and the last download time. |
| Delete the transfer | “Delete transfer” removes the transfer. Files in the destination storage (S3 / R2) are also deleted, and this cannot be undone. |
| Expiry | Expired transfers are cleaned up automatically, and the files are deleted from storage. The history remains in the logs. |
5How notification emails work
- Notification emails do not contain a direct download URL. Recipients can only get the files after verifying their email address.
- The notification email uses the language you choose when sending. Recipient screens and verification-code emails follow the recipient’s browser language.
Operation history is shown in Transfer logs. For recipients, share the steps in Receiving files.